Then, glue one on top of the other, alternating the petal points. Continue to draw leaves on each side of the stem. Free templates make the paper rose project a cakewalk for you. Fold it again from left to right to make a smaller square (4b). Step 01: Cut the paper as needed to make the rose. (This equates to one-quarter the area of the origami rose.) Adjust to size. unfold the rectangle and twist the tops of the leaves as shown in the picture. After cutting about four leaves per rose, I spread them flat on a sheet of paper and painted them the same green as the stems. Remove individual thorns with a paring knife or nail clippers.  Pull gently on the tape as you wrap this encourages it to stick to itself. Repeat the last step until all five petals layers are added, and only two remain. Step 11: Add the larger sprig of leaves to your stem and continue wrapping up and over it. c. Now fold from the left top side of the square to right bottom, to Scissors. Adding a stem to your paper rose. If you want a super full flower add more pieces of tissue paper. Step 05: Glue the prepared flower petals separately. Step 2. Fold it in half and take the end and fold it in half backwards. Cut each thorn at the stem, or just cut off the sharp part at the end of the thorn. Not only are they inexpensive, but if you know someone with allergies they are a good alternative to the real flowers. We shall need: -a drill (or any tools that can make holes) -an angle grinder or cutting nippers to cut a rod for a stem (if you have ready-cut piece of wire you wont need an angle grinder) -a hammer. Fold the triangle once again to make an even smaller triangle. Half fill clean sterilized pots and containers with a 50/50 mix of sand and potting soil. Cut them and you will have 12 pieces (24 for long stems).
 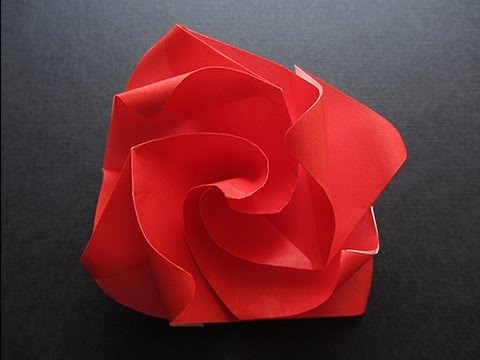 Using your 18 gauge wire, fashion a small circle at the top then fold it at a 90-degree angle. Grab one corner and bring it towards the opposite corner and fold it in half to make a triangle. Easy to maintain - You need to change clean water for fresh flowers and a little sunlight. Instructions. Avoid overwatering, as soggy soil will cause the stem to rot. Step 5: Prepare the stem. Cut out the leaves.
Apply Glue: Secondly, apply some glue on the paper stripe and put wire on it a little slanting. Step 02: Arrange the three cut circles in the shape of flower petals. Glue this circle wire to the base of the rosebud as shown. Glue some or all of them up to the side of the flower, depending on how you want it to look. This thin metal die is compatible with leading die cutting machines (sold separately). If you want to make a rose without the stem, you can refer to my How to Make a Paper Rose video.
Use a pencil to draw a spiral that begins along the edge of the Check out our flowers without stem selection for the very best in unique or custom, handmade pieces from our shops. Place cuttings into pots, you can place several in one pot. At this point, you can leave your flower as is, or move on to make a paper stem. The wire stem makes the rose very useful as you can add it into a bouquet or trim and curl the wire end. To build the rose center, tuck and twist the petals tightly together with one of the petal layers. full sheets of tissue paper in different colors. b. Add a little bit of glue to the inside, and pinch it closed around the wire. If you used 12-by-6-inch tissue paper for the flower, the leaves should be at least 4 inches long and about an inch at their widest point. Place the bottom end of a pen on top of the petals. Single stem crepe paper flower, open flower, single stem open crepe paper flower with leaves, Valentine's Day Flowers, Mother's Day flowers. -a tool to cut threads. $10.20 $ 9.17 ($1.03 Off) Add To Cart. Glue gun and glue stick. The pieces may be any size, just keep in mind that their diameter will be roughly half the width of the finished rose. TIPS: Your first attempt at making the roses may not look quite right, but dont be afraid to primp the rose until you like what you see. Select the paper in respective colors and fold them like a genius to make cool and colorful roses, which can be put in a jar for making a gorgeous vase. Step 10: Cut a 12 piece of floral wire. Open it back up and repeat for the other 2 sides. These are the napkins I used: Pink 13 x 13 size. Step 06: Add the petals and paste the rose. If you want to make a rose without the stem, you can refer to my How to Make a Paper Rose video. The number of pieces you layer is up to you. Flip the paper and do the same on the other side as shown in the picture. a. Awl tool. This will make the petals look more realistic. Take your square of paper and fold it in half so that one side lies on top of the opposite side. Save. Use my printable pattern and easy tutorial to make a long stemmed paper rose that you can add into any bouquet, use for a corsage or top a gift. Shop Give a Gift Log In Learn More Craft Collection Craft Academy Shop Give a Gift Log In Paper Flowers Crepe Paper Flowers In this video, I'm gonna show you how I put a stem and leaves in my Tiny Paper Flowers. If you want a simple flower, just use a few. The only difference is using a florist wire or a removable bamboo skewer to create your rose center. You can make them into earrings or a boutonniere if you so wish. Fold the paper in half (Start with the colored side down, white side up). Rose Out of Paper. I have included a download for a step-by-step photo tutorial on how to make the long stemmed rose. If you are cutting by hand, print the template Turn it and fold it in half again so you have another even square, but layered and smaller. Step 03: Separation of flower petals into sections. Once the leaves dry, bend them slightly to give them the look of a natural leaf. Step by Step Process for Easy Rolled Paper Flowers. After adding a generous amount of hot glue on top of the wire circle and surrounding leaf, press your finished flower bud on till dry. STEP 4: Make the petals of the rose. supplies needed: Any size paper napkin. First step: Print out the free template, then cut out the pattern pieces using scissors. Step 01: Cut the paper as needed to make the rose. Step 02: Arrange the three cut circles in the shape of flower petals. Step 03: Separation of flower petals into sections. Step 04: Arrange the flower petals in a circle. Now, open out the last fold you just made and youll have a perpendicular fold along the center of your triangle. Step 2: Stems. Step 1. Bend the petals upwards and wrap them around each other as if they were hugging each Step 8 Check the rose stem for rooting after four weeks.
Teacup I used this: Large Blue and White Spode Cup and Saucer.
You might have seen many paper rose tutorials from cardstock, but I found that making the smooth curves of the petals without the creases is so hard. Thats why I made this step by step paper cardstock rose tutorial. Card-stock is stiff, and making a rose from card-stock is difficult. -some pairs of pliers (its better to have different types) - tin snips. Reproduction in whole or in part without permission is prohibited. Click the fill bucket tool and then click a petal. This stem border die is from Paper Rose and is perfect for making a border on your cards and other projects. To learn how to make this paper rose, please click here: https://www.dreamyposy.com/paper-rose-tutorial/ Make out the rose bud by leaving the top part and turning the toilet paper around several times tightly to form the stem of your paper rose.
Keep moist until ready to pot. It's a beautiful design but incredibly intimidating if you're just learning the basics of the art of paper folding. Cut a rectangle out of the green crepe paper, 11 cm in width and 6 cm tall. Cut a rectangular piece out of green craft paper and roll it into a straw pattern to create the stem of the flower; apply glue to secure the roll.
: During the cutting of any kind of paper you definitely want smooth edges.And so, move the Once its secure, curl or bend the sepal tips the way you like. Color the rose. Step 11: Take the green leaf stems and fold each leaf in half. Now take the little rectangle and put a fold in the center. Then turn the paper over this is important. Stack the petals on top of one another. Step 1: We Shall Need. Wound end of cuttings (optional) Dip cut end into rooting hormone. 3. Mix potting soil with horticultural sand to a ratio of 50/50. 5. We played around with different amounts and discovered that a layer of tissue paper from 8-12 sheets made a pretty flower. For a digital drawing use the fill bucket tool. If using a cutting machine like a Cricut or Silhouette, upload your template. Draw a spiral within the circle. Rose Template. Cutting machine or scissors. The long stem looks beautiful on the realistic rose flower.
Usually Ships Next Day or Sooner. Tug on the tip lightly; it has rooted if there is resistance.
Open it back up and repeat for the other 2 sides. Make a 2-inch fold in a piece of green cardstock or construction paper. Step 1. Cut the paper as shown in the picture. The tutorial comes with a free pattern. Also, use the paper chosen for the center petals to cut out a strip and create fringe on it with round edges. Although origami roses are among the most popular paper-folding projects, many rose designs are far beyond a beginner's capabilities.
Step 2: Make the Stem and Fringe of the Tissue Paper Rose. To build the paper rose, open out two of your petal layers. If you want a green stem make sure to place a piece of green tissue paper on the very bottom. Wrap the floral tape around the stem, beginning at the base of the rose. Bring the bottom Arrange the petals of the rose by opening them up to make it similar to a real rose bud. You start by cutting your tissue paper into squares. Create Leaves. a marker, a small cup and. Step 14: Create Leaves. The wire stem makes the rose very useful as you can add it into a bouquet or trim and curl the wire end. Start in one corner, and carefully roll diagonally until youve rolled it up completely. Step 04: Arrange the flower petals in a circle. Step 8. First, grab your paper and lay it out on a flat work surface. To make the rose center, glue 2 of the smaller petals across from each other overlapping. Take your square of paper and fold it in half so that one side lies on top of the opposite side. Then turn the paper over this is important. Step 3: make the triangles. To make the stem, trim your text weight paper to 2 x 10. Draw a thorn by making a triangular shape on the side of the stem. Greenery: optional as little or much as you want. Mist the rose stem with water every three to five days, or just before the soil surface dries completely. I traced and cut leaves out of one of the cut pieces of an empty toilet paper roll. Way of the making. Take Green Stripe And Thick Wire: Firstly, take one green stripe and a little thick wire. Here the sample jars come filled with faux moss. DIY Paper Roses. The bigger, 7 layer rose video tutorial. How to Make Paper Roses: Think of using your origami art to add more decorative details and elements to your home. Wrap several inches at the bottom. Step 9. Again, put a drop of white glue in the very center of the leaf group. It is important that you hold it there for at least 30 seconds or it may fall off before adhered. This tutorial includes: The small, 5 layer rose video tutorial. Roll a piece around a chopstick and then twist the piece creating a long stick and glue the corner down. Step 1: Layer your tissue paper sheets together. Stick the sharp end of the skewer through the center of the leaf group and push it up against the previous petals. If it seems a little short, you can try lengthening it by gently pulling the ends. Fatima Siddiqui June 21, 2013 at 1:43am. Now, take your square of paper and fold it in half so that one corner folds over to reach the opposite corner forming a triangle. Cut out six of each size Then cut a 3-4 piece of floral tape and begin wrapping it around one end. Clear Tape. If you want to make a rose without the stem, you can refer to my How to Make a Paper Rose video. Wrap It Around: Finally, wrap the paper stripe around the wire to cover it completely. To keep the origami leaf in proportion with the easy origami rose, you need to start with a piece of paper that is half the width.
Step 5. Draw a teardrop shape to make a leaf on the left side of the stem. We used a 15 x 15cm piece of paper for the origami rose, so the origami leaf is made from a piece of paper 7.5 x 7.5cm. First Folds. Now, take your square of paper and fold it in half so that one corner folds over to reach the opposite corner forming a triangle. Take your first square and fold it neatly and evenly in half so you have a doubled rectangle. The Kawasaki rose, for example, has 29 steps and includes both inside and outside reverse folds. The larger it is, the larger the flower will be. The only difference is using a florist wire or a removable bamboo skewer to create your rose [] Reply. Take one of the square pieces and fold it into half horizontally from bottom to top (4a). Add Tip. The common mistake correction (video) The complete templates, including petals, sepals and leaves for both the 5 layer rose and the 7 layer rose. Curl and wrinkle the tissue paper slightly. You can also add more embellishments or add a sentiment on the solid strip. Open up the lower part of the toilet paper in the form of a skirt.
a pair of scissors. 2. Next, trace the pattern pieces on your paper (I used old book pages), then cut around your traced markings. Tissue paper roses are perfect to use as decorations, gifts or for scrapbooking. Draw leaves on the folded edge. First Folds. When your pieces of paper are completely dry get 3 (6 for long stem roses) green pieces and fold them twice making 4 pieces measuring 2.25 inches by 8.5 inches. You can use different colors of tissue paper or the same color. Be generous with your glue and hold till dry. : Use a hard wire in order to make a decent stem. For making a larger flower, just increase the number of petals and size of the squares: If you want to make paper roses for decoration purpose and without a stem, then you do not need to make a tiny hole while cutting.