You can simply have the paint counter at Home Depot or Lowes mix up the paint in one of the lower-quality paint samples. Log in. Thank you, Karen!! Honestly this technique is so simple, it feels silly to make steps for it. See our full disclosure here. You can find the tutorial here: https://theturquoisehome.com/diy-wood-planter-boxes/ xo, Laura. xo, Laura. That is if you can get the entire surface painted within 30 seconds or so. At Making Manzanita, you'll find step-by-step home improvement tutorials and design inspiration. wikiHow's Content Management Team carefully monitors the work from our editorial staff to ensure that each article is backed by trusted research and meets our high quality standards. Thanks for the great DIY! Thank you so much. Using a foam brush apply to each piece of wood over dry stain. Looks great! Id just try it in a little spot and go from there!
Once the furniture or woodworking project has had a chance to fully dry, you can seal it. ", https://akadesign.ca/grey-wash-wood-finish/, http://salvagedinspirations.com/how-to-grey-wash-furniture-with-wax/. 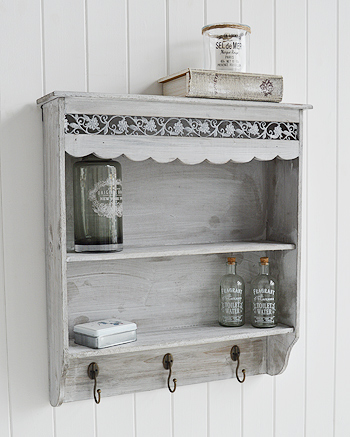 finish. You canclick here for our originalUpcycled Barn Door Reveal. "Follow directions for measurements carefully - I 'eyeballed' it, and the paint was prominent, did not appear as the. Agate Inspired Layered Paper Veneer DIY Jewelry. This article has been viewed 100,624 times. But what if you dont want to pay the high price tag to get it in your own home? Use the dry brush technique with gray paint, The first layer of the gray wash wood technique is a dark wood stain. By signing up you are agreeing to receive emails according to our privacy policy. awesome!". Allow the final coat to dry for 15 to 20 minutes before moving on to the next step. Mix white paint and water in a 50/50 ratio. Work the stain in the wood by wiping the rag with the direction of the wood grain. Please feel free to share or pin my posts! Required fields are marked *, document.getElementById("comment").setAttribute( "id", "a050dc85e817a13bcb80c362386a9848" );document.getElementById("gdd7bf3394").setAttribute( "id", "comment" );Comment *. The planters look great! This post contains affiliate links & photos. The first layer of the gray wash wood technique is a dark wood stain. Learn how to DIY it with this step-by-step tutorial for how to gray wash wood! So, you might end up having to sand the sealer off first, but that sounds like a big job to me. Get the look of old barn boards or refinish your furniture using this grey wash finish tutorial. This step is completely optional. Its really easy to accidentally have an arc shape because thats the natural motion of your arm as youre wiping. Within 30 seconds or so, wipe off paint using a lint-free rag. Other dark wood stains, like Coffee, Jacobean, or Ebony, would also work well. Please do not edit or crop that single image in any way. So Pretty! I have a sofa frame in my classroom that is already a dark wood. But another thing is that youll have to redo the stain about every other year or so. I went with a clear spray lacquer finish because it is easy to apply, dries quickly, and does not yellow on light-painted surfaces. I love these because they have a built-in magnetic brush holder and a handle, which makes them super easy to carry. In the end I did a combination of both paint and stain to achieve a gray wash look. The look of aged barn wood. How to Make Poke Cake with Jello: A Fun Dessert for Any Occasion. These look really amazing after this finish. Id try it out in an inconspicuous spot first and see how it does. Because the coverage isnt important, paint quality is not of concern. deck redwood solid stained
Youll also want to do more research. As mentioned above, I used a 50% water to 50% paint ratio. Lightly sand with a sanding block to get rid of any imperfections or overlap in paint.  By using our site, you agree to our. By following along with our simple step-by-step tutorial for how to gray wash wood, youll get the look that youre going for! As an influencer, Chelsea has collaborated with brands like The Home Depot, Etsy, Behr Paint, DAP Products, Walmart, Frog-Tape, and Kreg Tools. I love how it turned out, so I thought Id share this super easy technique. To grey wash wood, you can either use paint and water or paint and wax. Easy DIY grey wash finish. How to Make a Magnolia Leaf Wreath on the Cheap! Sign up for wikiHow's weekly email newsletter. Funny story about faux greenery, I purchased some faux shrubs that look like boxwoods to put in planters by my front door. Every time I go to write a blog post with gray, I never know whether to spell it gray or grey. Improper use of my photos, ideas or words is a violation of copyright. All tip submissions are carefully reviewed before being published. If you are using new wood, like we were in our DIY cookbook stand, you can apply the wood stain directly to the wood with a staining rag. Make sense. Your email address will not be published. Try not to get any primer/paint on the rounded edge of the table. There are more natural colours but there are also grey tones. With paint and wax, you won't be able to see the wood grain. I thought I would just paint them, so it wouldnt matter. This will be a light grey-wash. Within 30 seconds or so wipe off the paint from the surface with a dry lint-free rag. console entryway cabinet wood shelves table storage doors glass contemporary gray door frosted pasco wash accent display dialog displays option Thanks for reading!! If you love DIY videos, be sure to subscribe to our YouTube channel! They enjoy teaching readers how to renovate with confidence. {"smallUrl":"https:\/\/www.wikihow.com\/images\/thumb\/6\/66\/Preserve-Wood-Step-4-Version-2.jpg\/v4-460px-Preserve-Wood-Step-4-Version-2.jpg","bigUrl":"\/images\/thumb\/6\/66\/Preserve-Wood-Step-4-Version-2.jpg\/aid9276032-v4-728px-Preserve-Wood-Step-4-Version-2.jpg","smallWidth":460,"smallHeight":345,"bigWidth":728,"bigHeight":546,"licensing":"
License: Creative Commons<\/a> License: Creative Commons<\/a> License: Creative Commons<\/a> License: Creative Commons<\/a> License: Creative Commons<\/a> License: Creative Commons<\/a> License: Creative Commons<\/a> License: Creative Commons<\/a> License: Creative Commons<\/a> License: Creative Commons<\/a> License: Creative Commons<\/a> License: Creative Commons<\/a> License: Creative Commons<\/a> License: Creative Commons<\/a> License: Creative Commons<\/a> If your wood is already painted a very light color and you dont want to change it, you can skip the sanding and painting steps. But when I wiped the white paint mixture off the Xs, the filled nail holes showed up too much. aspennfurniture wash aspenn designlina carrara patello pavillion washstand sortingwithstyle remodelingtips salvat Use a stain. Required fields are marked *. But I know sometimes the most simple tutorials are the most helpful! You may be thinkingwhy are you using white paint for a gray wash? Restoration Hardwares got it. Learn how to graywash furniture it's suuuuuper easy! #reallifeconfessions. Grey-tinted furniture and doors can add a neutral, classy, and cozy feel to your home. P.S. Repeat on all sides for each piece. Pottery Barns got it. Do you think I could just try to watered down paint technique, without staining it first? Apply paint and water wash over stain using a foam brush. Making Manzanita has participated in One Room Challenge and was a finalist in the Fall 2019 Jeffrey Court Renovation Challenge. Let dry. I used a mixture of about 1 part paint to 4 parts water, using CIL Stratosphere (the color) color matched into Sherwin Williams paint (at the store). And I wanted to showcase them both in my fall home tour, so it was a good deadline for me to have to finish them. Let the stain dry thoroughly. It definitely needs an update. Work with small batches since the paint/wax combo will begin to harden after a while. Do you love that rustic gray wash wood style? Using these techniques, you can also blue wash, whitewash or green wash wood. For more tips on how to get the best finish, like making the effect darker or lighter, keep reading! If you want to add rustic charm to a painted piece, grey wash it with paint and wax. The practice of white washing wood has been around for a long time, but grey washing wood has been gaining popularity in recent years. You can add more water depending on your paint coverage preference, but I found the 50% combination to be just right! You're welcome to use ONE of my images (no collages or pinnables) with a link back to the corresponding post. Using a foam brush apply Dark Walnut stain going with the grain to wood in a well-ventilated area. What color? Wipe off excess stain with a lint free cloth or rag. whitewash gray paneling wood treatment Love all your tips and ideas, with paint and different techniques. I made them! I always wondered how to get that grey look on wood. You get GRAY! FREE: 5 Secrets Every Home Decorator Knows. Please leave a comment on the blog or share a photo on Pinterest. Mix 50% white paint and 50% water together in a bowl or my favorite paint pail. For the paint, it doesnt matter too much exactly what type of latex paint you use. It will just be much whiter than mine. If you get the water-down paint added and you like to color, you dont need to wipe it off.
\n<\/p>
\n<\/p><\/div>"}, {"smallUrl":"https:\/\/www.wikihow.com\/images\/thumb\/0\/07\/Cover-Wood-Paneling-Step-6-Version-4.jpg\/v4-460px-Cover-Wood-Paneling-Step-6-Version-4.jpg","bigUrl":"\/images\/thumb\/0\/07\/Cover-Wood-Paneling-Step-6-Version-4.jpg\/aid9276032-v4-728px-Cover-Wood-Paneling-Step-6-Version-4.jpg","smallWidth":460,"smallHeight":345,"bigWidth":728,"bigHeight":546,"licensing":"
\n<\/p>
\n<\/p><\/div>"}, {"smallUrl":"https:\/\/www.wikihow.com\/images\/thumb\/9\/9d\/Cover-Wood-Paneling-Step-8-Version-3.jpg\/v4-460px-Cover-Wood-Paneling-Step-8-Version-3.jpg","bigUrl":"\/images\/thumb\/9\/9d\/Cover-Wood-Paneling-Step-8-Version-3.jpg\/aid9276032-v4-728px-Cover-Wood-Paneling-Step-8-Version-3.jpg","smallWidth":460,"smallHeight":345,"bigWidth":728,"bigHeight":546,"licensing":"
\n<\/p>
\n<\/p><\/div>"}, {"smallUrl":"https:\/\/www.wikihow.com\/images\/thumb\/e\/e5\/Cover-Wood-Paneling-Step-2-Version-4.jpg\/v4-460px-Cover-Wood-Paneling-Step-2-Version-4.jpg","bigUrl":"\/images\/thumb\/e\/e5\/Cover-Wood-Paneling-Step-2-Version-4.jpg\/aid9276032-v4-728px-Cover-Wood-Paneling-Step-2-Version-4.jpg","smallWidth":460,"smallHeight":345,"bigWidth":728,"bigHeight":546,"licensing":"
\n<\/p>
\n<\/p><\/div>"}, {"smallUrl":"https:\/\/www.wikihow.com\/images\/thumb\/9\/99\/Inlay-Wood-Step-9-Version-3.jpg\/v4-460px-Inlay-Wood-Step-9-Version-3.jpg","bigUrl":"\/images\/thumb\/9\/99\/Inlay-Wood-Step-9-Version-3.jpg\/aid9276032-v4-728px-Inlay-Wood-Step-9-Version-3.jpg","smallWidth":460,"smallHeight":345,"bigWidth":728,"bigHeight":546,"licensing":"
\n<\/p>
\n<\/p><\/div>"}, {"smallUrl":"https:\/\/www.wikihow.com\/images\/thumb\/1\/1e\/Stain-Wood-Doors-Step-5-Version-2.jpg\/v4-460px-Stain-Wood-Doors-Step-5-Version-2.jpg","bigUrl":"\/images\/thumb\/1\/1e\/Stain-Wood-Doors-Step-5-Version-2.jpg\/aid9276032-v4-728px-Stain-Wood-Doors-Step-5-Version-2.jpg","smallWidth":460,"smallHeight":345,"bigWidth":728,"bigHeight":546,"licensing":"
\n<\/p>
\n<\/p><\/div>"}, {"smallUrl":"https:\/\/www.wikihow.com\/images\/thumb\/d\/d3\/Preserve-Wood-Step-8.jpg\/v4-460px-Preserve-Wood-Step-8.jpg","bigUrl":"\/images\/thumb\/d\/d3\/Preserve-Wood-Step-8.jpg\/aid9276032-v4-728px-Preserve-Wood-Step-8.jpg","smallWidth":460,"smallHeight":345,"bigWidth":728,"bigHeight":546,"licensing":"
\n<\/p>
\n<\/p><\/div>"}, {"smallUrl":"https:\/\/www.wikihow.com\/images\/thumb\/c\/cc\/Remove-Adhesive-on-Hardwood-Floor-Step-12-Version-3.jpg\/v4-460px-Remove-Adhesive-on-Hardwood-Floor-Step-12-Version-3.jpg","bigUrl":"\/images\/thumb\/c\/cc\/Remove-Adhesive-on-Hardwood-Floor-Step-12-Version-3.jpg\/aid9276032-v4-728px-Remove-Adhesive-on-Hardwood-Floor-Step-12-Version-3.jpg","smallWidth":460,"smallHeight":345,"bigWidth":728,"bigHeight":546,"licensing":"
\n<\/p>
\n<\/p><\/div>"}, {"smallUrl":"https:\/\/www.wikihow.com\/images\/thumb\/e\/ec\/Cover-Wood-Paneling-Step-11-Version-3.jpg\/v4-460px-Cover-Wood-Paneling-Step-11-Version-3.jpg","bigUrl":"\/images\/thumb\/e\/ec\/Cover-Wood-Paneling-Step-11-Version-3.jpg\/aid9276032-v4-728px-Cover-Wood-Paneling-Step-11-Version-3.jpg","smallWidth":460,"smallHeight":345,"bigWidth":728,"bigHeight":546,"licensing":"
\n<\/p>
\n<\/p><\/div>"}, {"smallUrl":"https:\/\/www.wikihow.com\/images\/thumb\/e\/ed\/Remove-Paint-from-Wooden-Objects-and-Refinish-Them-Step-9-Version-2.jpg\/v4-460px-Remove-Paint-from-Wooden-Objects-and-Refinish-Them-Step-9-Version-2.jpg","bigUrl":"\/images\/thumb\/e\/ed\/Remove-Paint-from-Wooden-Objects-and-Refinish-Them-Step-9-Version-2.jpg\/aid9276032-v4-728px-Remove-Paint-from-Wooden-Objects-and-Refinish-Them-Step-9-Version-2.jpg","smallWidth":460,"smallHeight":345,"bigWidth":728,"bigHeight":546,"licensing":"
\n<\/p>
\n<\/p><\/div>"}, {"smallUrl":"https:\/\/www.wikihow.com\/images\/thumb\/2\/27\/Remove-Paint-from-Wooden-Objects-and-Refinish-Them-Step-25.jpg\/v4-460px-Remove-Paint-from-Wooden-Objects-and-Refinish-Them-Step-25.jpg","bigUrl":"\/images\/thumb\/2\/27\/Remove-Paint-from-Wooden-Objects-and-Refinish-Them-Step-25.jpg\/aid9276032-v4-728px-Remove-Paint-from-Wooden-Objects-and-Refinish-Them-Step-25.jpg","smallWidth":460,"smallHeight":345,"bigWidth":728,"bigHeight":546,"licensing":"
\n<\/p>
\n<\/p><\/div>"}, {"smallUrl":"https:\/\/www.wikihow.com\/images\/thumb\/5\/54\/Preserve-Wood-Step-10.jpg\/v4-460px-Preserve-Wood-Step-10.jpg","bigUrl":"\/images\/thumb\/5\/54\/Preserve-Wood-Step-10.jpg\/aid9276032-v4-728px-Preserve-Wood-Step-10.jpg","smallWidth":460,"smallHeight":345,"bigWidth":728,"bigHeight":546,"licensing":"
\n<\/p>
\n<\/p><\/div>"}, {"smallUrl":"https:\/\/www.wikihow.com\/images\/thumb\/b\/b3\/Preserve-Wood-Step-5.jpg\/v4-460px-Preserve-Wood-Step-5.jpg","bigUrl":"\/images\/thumb\/b\/b3\/Preserve-Wood-Step-5.jpg\/aid9276032-v4-728px-Preserve-Wood-Step-5.jpg","smallWidth":460,"smallHeight":345,"bigWidth":728,"bigHeight":546,"licensing":"
\n<\/p>
\n<\/p><\/div>"}, {"smallUrl":"https:\/\/www.wikihow.com\/images\/thumb\/e\/e6\/Remove-Paint-from-Wooden-Objects-and-Refinish-Them-Step-18-Version-2.jpg\/v4-460px-Remove-Paint-from-Wooden-Objects-and-Refinish-Them-Step-18-Version-2.jpg","bigUrl":"\/images\/thumb\/e\/e6\/Remove-Paint-from-Wooden-Objects-and-Refinish-Them-Step-18-Version-2.jpg\/aid9276032-v4-728px-Remove-Paint-from-Wooden-Objects-and-Refinish-Them-Step-18-Version-2.jpg","smallWidth":460,"smallHeight":345,"bigWidth":728,"bigHeight":546,"licensing":"
\n<\/p>
\n<\/p><\/div>"}, {"smallUrl":"https:\/\/www.wikihow.com\/images\/thumb\/9\/9a\/Remove-Paint-from-Wooden-Objects-and-Refinish-Them-Step-30.jpg\/v4-460px-Remove-Paint-from-Wooden-Objects-and-Refinish-Them-Step-30.jpg","bigUrl":"\/images\/thumb\/9\/9a\/Remove-Paint-from-Wooden-Objects-and-Refinish-Them-Step-30.jpg\/aid9276032-v4-728px-Remove-Paint-from-Wooden-Objects-and-Refinish-Them-Step-30.jpg","smallWidth":460,"smallHeight":345,"bigWidth":728,"bigHeight":546,"licensing":"
\n<\/p>
\n<\/p><\/div>"}. Depending on how small your project is, you should attempt to paint the entire surface and then move on to wiping off. You DIY your own grey wash wood finish, of course! Your brush strokes should be as straight as possible. Let dry. As an Amazon Associate I earn from qualifying purchases. I am an Amazon Associate and earn from qualifying purchases. shelves grey shelf hooks living wash thewhitelighthousefurniture furniture accessories hallway lighthouse wooden It might not adhere very well if the stained wood is sealed. Complete the waxing and buffing of each side before flipping the wood to wax another side. Thanks! What then? Get 40+ beautiful FREE printables for every season and every room! Stir until completely combined.  DIY Wood Wall Art with Scrap Wood and Wood Shims, How To Build A Christmas Tree Box Stand with Shiplap, Grid Gallery Wall Reveal (and How To Hang Gallery Wall), How To Build Pipe Shelves: Laundry Room Shelving, Your email address will not be published. This watered-down paint is what gives it that wash characteristic, meaning that the paint cover is opaque and see-through. {Reality Daydream} #whit - diydecor, Piece of furniture with a wooden (not painted!) Mix a small amount of light grey latex paint and water into a plastic cup. 2000mm impulse cupboard paperstone Your email address will not be published. Chelsea is the founder of Making Manzanita - a DIY and renovation blog - where it's all about making your house a home you love one DIY at a time. Its a quick 5 step process! It also helped get rid of some of the areas of imperfection. I plan to grey dry wash older wooden chairs, then use outside to set plants on spring through fall. This removed some of the paint, revealing the darker wood-stained surface. Sanded it. I was planning to sand lightly and then do a 2nd coat on everything to try to even things out, but I ended up really liking the sort of distressed look that the sanding brought, so I left it. Im a natural procrastinator, so a deadline helps me out a lot! Also, the fall printables you sent out a few days ago are so cute. Are the evergreen shrubs real or faux? Next, you can add the water-down paint wash directly over the dried stain on your wood project. White latex paint (We used Behr's Snowy Pine paint color), DIY Cookbook Stand with Free Woodworking Plans, Add a watered down white paint over dark stained (or medium stained) wood. Grey. For more tips on how to get the best finish, like making the effect darker or lighter, keep reading! Or did I want to paint them or stain them? But it took me a while to figure out how I wanted to finish them. Once I got the gray wash paint added to the stained surface, I ran into some issues with imperfections where there were areas overlapping with 2 coats of paint instead of 1. Thanks to all authors for creating a page that has been read 100,624 times. xo, Laura, Your email address will not be published. So glad you love them! wood stains gray samples stain grey colors weather chart weatherwood barn species reclaimed screen order side weatherwoodstains facts additional need Chelsea and her husband, Logan, have been renovating homes since 2015 and have seen the sweat equity pay off. Grey Wash Wood Finish How to Get the Grey Distressed Look on Your Own Furniture, Paint Finishes: How to Choose the Right One (Paint Sheen Guide), DIY Board and Batten Tutorial: How to Install it on a Budget. I appreciate your support so much! You wont be able to see the natural wood grain with this one, but the layered paint look mimics the wood grain. Hi Susan! Whatever you do, DONT use polyurethane as a finish over your gray wash because it will appear yellow or amber-colored on the surface and I dont think that is what you want! If youre wanting to do a gray wash over wood that is already stained and sealed, like furniture, youll want to lightly sand the glossy shine off of the piece first. Sand each piece of wood. So I recommend doing one stripe all the way across the table, and promptly wiping it with your cloth to smear it and take the majority of the primer/paint off. This will lighten the wood and give it an aged appearance. Feel free to tape it off if its easier for you. Let it sit for a couple of minutes and then wipe off the excess with a dry rag. A Guide to Wall Trim and Wall Molding Ideas, How to Add Curtain Trim Tape for a Custom Look, DIY Chinoiserie Pumpkins {with video tutorial}, Lessons Learned from a Craigslist Dresser, https://theturquoisehome.com/diy-wood-planter-boxes/, White paint (I used some Benjamin Moore Simply White latex paint I had leftover from the girls bathroom makeover). document.getElementById( "ak_js_1" ).setAttribute( "value", ( new Date() ).getTime() ); I'm Chelsea and he's Logan. If you want it to be lighter, more like a whitewash, go with more paint. If you're using paint and wax, apply a white or cream latex paint and a clear wax base coat to the wood, before wiping grey wax over the surface. You could also use Polycrylic as an alternative to lacquer. There are a few different ways to accomplish this: I chose to try a dark stain combined with a watered-down white paint for the gray wash wood technique on the cookbook stand. If you use paint and water, you'll still be able to see the wood grain underneath. Well, what happens when you mix white and black (the black in this case in the dark pulling in from the wood stain)? Weve found that many couples don't know how to start renovating their homes, which is why our passion is teaching others how to make their house a home they love - one DIY at a time. Learn how to create a gray wash effect on raw wood with a simple paint mixture. Aww, thanks so much Karen! Anyway, the rest of the planters have the gray washed effect and I love how they turned out! But I kind of like how the Xs now stand out more. It was so fun to make!